When you first step into the world of forex trading, it feels like trying to solve a giant puzzle where every piece keeps moving. One day the market is bullish, the next it’s crashing down. Amidst this chaos, traders look for patterns—visual clues hidden in charts that hint at what might come next. One of the most powerful and widely respected of these clues is the Gartley Pattern.

This article will give you everything you need to know about Gartley Patterns, their bullish and bearish setups, how to trade them, and how they can make or break your trading journey. We’ll also keep it practical, conversational, and filled with analogies so even if you’re new, you’ll walk away with clarity. Buckle up—this is going to be a deep dive.
What Is the Gartley Pattern?
The Gartley pattern is a harmonic chart pattern discovered by H.M. Gartley in the 1930s. Imagine it like a roadmap for the market, made up of zigzag lines that form a specific structure. These aren’t random squiggles—they’re mathematical ratios based on Fibonacci retracements.
In simpler words: The Gartley pattern shows you when the market is taking a “breather” before continuing in its main direction. Traders love it because it helps identify high-probability reversal zones—areas where price is very likely to change direction.
The Anatomy of a Gartley Pattern
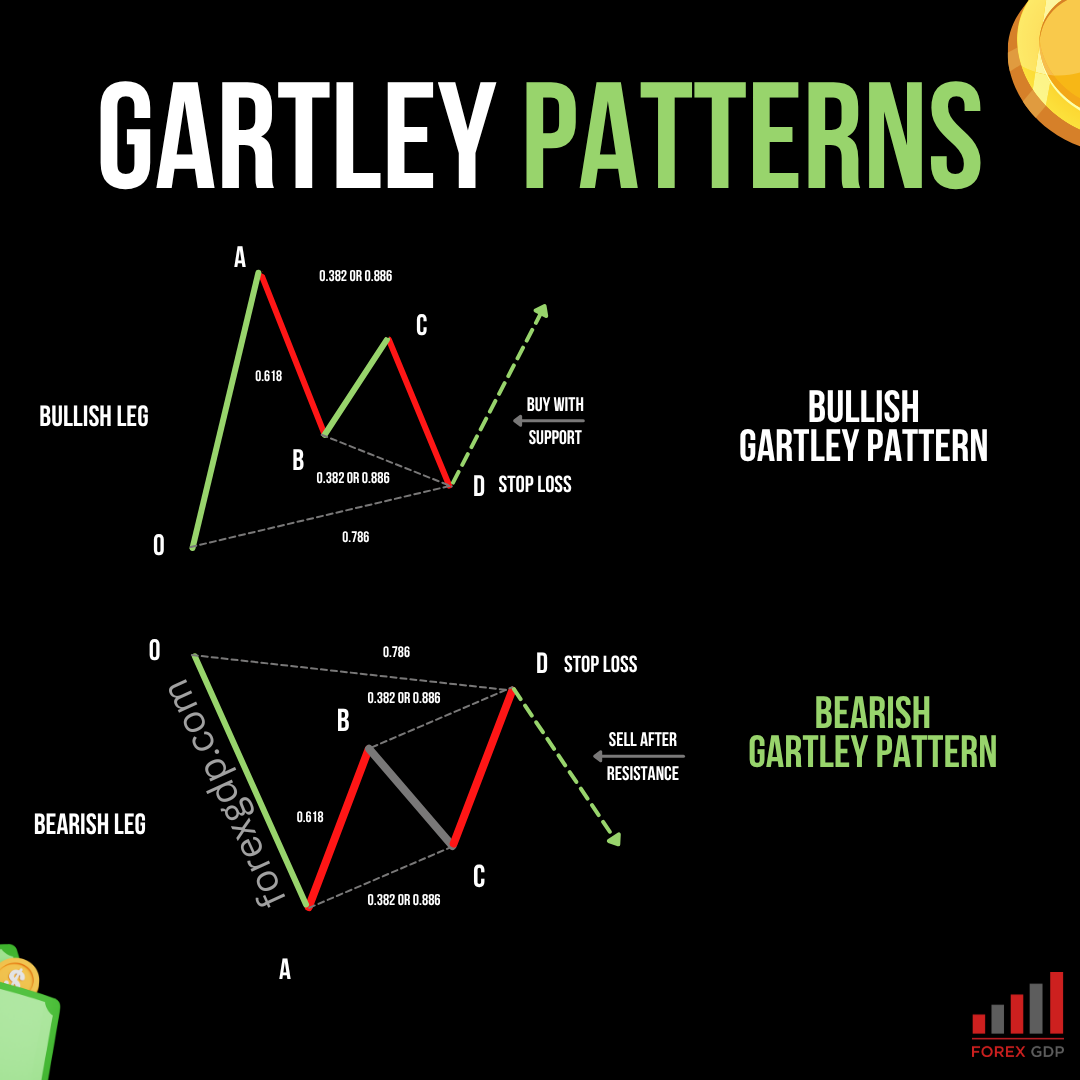
A proper Gartley has four legs: OA, AB, BC, and CD. Think of it as the market walking in a zigzag path—forward, backward, then forward again.
-
O to A (Impulse Leg): The first big move (either bullish or bearish).
-
A to B: A retracement, usually about 61.8% of the OA leg.
-
B to C: Another move, retracing 38.2% to 88.6% of AB.
-
C to D: The final leg, extending close to 78.6% of OA.
The magic happens at point D, where traders look for entries because the price is expected to reverse.
Bullish vs. Bearish Gartley Patterns
The Gartley pattern works in both directions:
-
Bullish Gartley Pattern: Happens after a bearish move. It signals the end of selling pressure and the beginning of a possible rally. Traders look to buy at point D with stop losses below.
-
Bearish Gartley Pattern: Forms after a bullish move. It warns that the uptrend is losing steam, and sellers might take over. Traders look to sell at point D with stop losses above.
Think of it like this: A bullish Gartley is the market catching its breath before running uphill, while a bearish Gartley is the market getting tired before tumbling down.
The Fibonacci Connection
Without Fibonacci ratios, the Gartley pattern wouldn’t exist. These ratios act like the secret DNA of price action. The key Fibonacci levels you’ll see in a Gartley are:
-
0.618 retracement of OA at point B
-
0.382 to 0.886 retracement of AB at point C
-
0.786 retracement of OA at point D
If these ratios don’t align, it’s not a Gartley. That’s why many traders mess up—they force a pattern where it doesn’t belong.
Why Traders Trust the Gartley Pattern
You might be thinking: “Why bother with all these zigzags?” Because the Gartley pattern has stood the test of time. Here’s why traders love it:
-
High Probability: It filters out noise and focuses on strong reversal zones.
-
Risk Management: Gives clear stop-loss placement.

-
Predictability: It’s based on fixed Fibonacci ratios, not vague guesses.
-
Flexibility: Works across forex, stocks, crypto, and commodities.
In short, the Gartley isn’t just another “guessing game.” It’s a proven system rooted in market psychology and math.
Step-By-Step: How to Trade a Bullish Gartley
Let’s break it down like a recipe:
-
Spot the Setup: Look for a bearish leg (OA), followed by retracements and extensions matching Fibonacci levels.
-
Wait for Point D: This is your potential buy zone (around 78.6% retracement of OA).
-
Enter the Trade: Buy as soon as the price confirms support at D.
-
Set Stop Loss: Place it just below point D (safety net in case the pattern fails).
-
Target Profits: Aim for point B or point C as your take-profit zones.
Step-By-Step: How to Trade a Bearish Gartley
Trading the bearish version is like flipping the bullish playbook upside down:
-
Spot the Setup: Look for a bullish OA move followed by retracements.
-
Wait for Point D: Price approaches the 78.6% retracement of OA.
-
Enter the Trade: Sell as the market confirms resistance.
-
Set Stop Loss: Place it slightly above point D.
-
Target Profits: Aim for point B or C as exit points.
Common Mistakes Traders Make
Even though the Gartley pattern is powerful, many traders get it wrong. Here are the biggest blunders:
-
Forcing Patterns: Just because lines look similar doesn’t make it a Gartley.
-
Ignoring Fibonacci Ratios: Without precise ratios, it’s just a random shape.
-
Late Entries: Jumping in after the price already reversed.
-
Poor Risk Management: Not setting stop losses, hoping for the best.
It’s like trying to bake a cake without following the recipe—you’ll end up with a mess.
Gartley vs. Other Harmonic Patterns
The Gartley is just one member of the harmonic family. Others include:
-
Bat Pattern – Similar but D ends at 88.6% retracement.
-
Butterfly Pattern – D goes beyond the starting point (O).
-
Crab Pattern – D extends much further, around 161.8%.
The Gartley is considered the “classic” harmonic pattern—great for beginners before moving on to its more aggressive cousins.
Tools You Need to Spot Gartley Patterns
Manually drawing Gartleys can feel like hunting for constellations in the night sky. Luckily, trading platforms offer tools:
-
TradingView: Excellent for plotting Fibonacci levels.
-
MT4/MT5 with Harmonic Indicators: Auto-detects harmonic setups.
-
Pattern Recognition Software: Saves time but be careful—always double-check manually.
Think of tools as GPS—they’ll guide you, but you still need to keep your eyes on the road.
Risk Management with Gartley Patterns
Even the best pattern can fail. That’s why risk management is non-negotiable:
-
Never risk more than 2% of your account on one trade.
-
Always use stop losses.

-
Scale out profits instead of holding forever.
-
Confirm patterns with additional indicators like RSI or MACD.
Remember: The Gartley is a compass, not a crystal ball.
The Psychology Behind Gartley Patterns
At its core, the Gartley pattern reflects human behavior in the market:
-
Fear: At retracements, traders panic-sell.
-
Hope: As price bounces, buyers jump back in.
-
Greed: At point C, some chase the rally.
-
Exhaustion: By point D, the market is ready to flip.
Understanding this psychology makes the pattern even more powerful—it’s not just lines, it’s emotions on a chart.
Should You Rely Solely on Gartley Patterns?
The short answer: No. The Gartley should be part of a bigger toolbox. Combine it with:
-
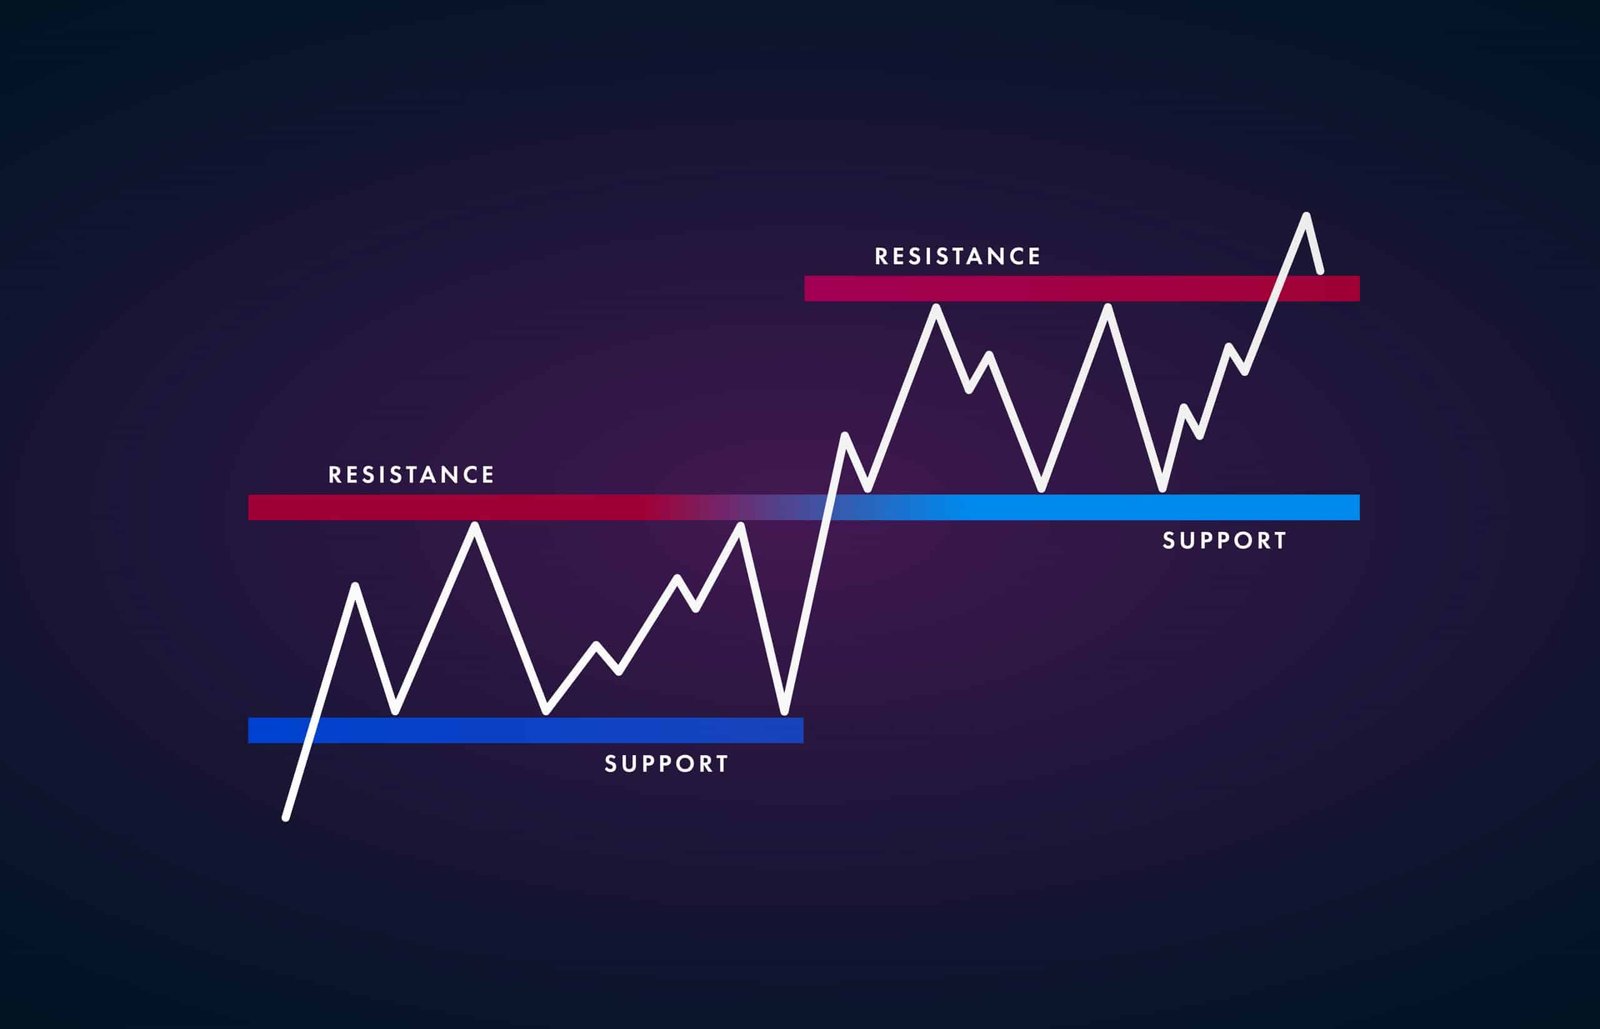
Support and resistance zones

-
Trendlines
-
Volume analysis
-
Candlestick patterns
This way, you avoid falling into the trap of “pattern blindness,” where everything looks like a Gartley.
Real-Life Example of a Bullish Gartley
Picture EUR/USD in a downtrend. Price moves OA, retraces 61.8% to point B, bounces, then retraces again to point D near the 78.6% level. Traders enter long at D, stop losses just below, targeting point B.
Result? A profitable bounce that aligns perfectly with the Gartley roadmap.
The Dark Side of Gartley Patterns
Here’s the uncomfortable truth: Not every Gartley works. Sometimes the market just bulldozes through point D and wipes out your trade. Other times, false Gartleys lure traders into traps.
That’s why discipline, patience, and confirmation signals are crucial. Without them, the Gartley becomes nothing more than a gamble.
Conclusion
The Gartley pattern is like a treasure map—if you follow it correctly, it can lead you to consistent profits. But if you misread it or ignore the rules, it can also lead to disappointment. It’s not magic; it’s math, psychology, and discipline rolled into one.
Use it wisely, combine it with other tools, and never forget the golden rule: Protect your capital first, profits second.
FAQs
1. Can the Gartley pattern be used in crypto trading?
Yes, it works in crypto, forex, stocks, and commodities. Price psychology doesn’t change across markets.
2. Is the Gartley pattern suitable for beginners?
It can be tricky at first because of Fibonacci ratios, but with practice, beginners can master it.
3. How reliable is the Gartley pattern?
On average, it has a 60–70% success rate when traded with proper risk management and confirmations.
4. What’s the best time frame to trade Gartley patterns?
It works on all timeframes, but higher timeframes (H4, Daily) tend to give more reliable signals.
5. How do I confirm a Gartley trade?
Use tools like RSI divergence, candlestick reversal signals, or strong support/resistance zones for extra confirmation.
